Hey there, fellow audio lovers and DIYers! Let’s cut to the chase: if you’ve ever tried setting up a home theater, a backyard party speaker, or even just your trusty bookshelf speakers, you’ve probably stared at a pair of bare speaker wires and a back of a speaker, thinking “Wait, how do I actually make this connection without frying my gear or messing up the sound?” As someone who’s been in the speaker wire game for over 10 years (yeah, that’s basically my thing), I’ve seen so many folks mess this up—either stripping too much insulation, mixing up positive and negative, or just getting those tiny wire strands all tangled up. Today, I’m gonna walk you through this step by step, no fancy jargon, just real talk from a wire supplier who’s helped hundreds of people get their connections right. Wire

First, let’s get one thing straight: speaker wire connections aren’t rocket science, but they do matter. Messing it up can make your bass sound weak, your vocals muffled, or even damage your amplifier if you short the wires. And trust me, I’ve seen way too many people grab the first random wire from their junk drawer, only to realize later it’s too thin (that makes signal loss way worse) or has old, cracked insulation. That’s why having the right wire in the first place is half the battle. I sell all kinds of speaker wire—from 16-gauge for small bookshelf speakers (perfect for rooms up to 200 sq ft) to 12-gauge for big outdoor speakers or home theater setups where you’re running wire 50+ feet. But let’s not get ahead of ourselves; first, let’s cover the tools you actually need.
What do you need for this? Let’s keep it simple. You don’t need a $50 tool kit, just a few basics: wire strippers (don’t use scissors—they’ll cut the strands and leave sharp edges), a pair of small scissors or wire cutters, maybe a little electrical tape (for backup, not the main connection), and of course, your speaker and amplifier/receiver. Wait, also—pro tip: turn off your amp before you touch any wires. So many people forget this and get a little shock or accidentally hit the power button, which can mess with your gear. Rule #1: power off, unplug if you can, always.
Now, step 1: prep the wire. This is the part I see most people mess up. You want to strip about 1/2 inch of insulation off the end of each wire, right? Wait, wait—hold on, don’t strip too much. If you strip more than 1/2 inch, those loose wire strands will short against each other or the speaker’s metal frame. If you strip too little, the strands won’t reach the connection point, so you’ll get a loose, bad connection. How to do this right: clamp the wire strippers at the 1/2 inch mark (most strippers have size holes for gauges, so make sure you use the one for your wire—16g goes in the 16g hole, same for 12g), squeeze gently, and twist the stripper back and forth a little until the insulation slides off. Don’t pull the insulation hard—you’ll end up tearing some strands off, which is bad. Once you pull the insulation off, you’ll have those tiny copper strands sticking out. Now, twist them together! This is crucial. If the strands are loose, they won’t make a solid connection, and over time they’ll fray or come loose. Just twist ‘em tight like a little braid, so they form a single, solid metal end. That’s way better than leaving ‘em all floppy.
Next, step 2: identify positive and negative. Every speaker and every speaker wire has markings here, and mixing ‘em up (called “phase issues”) will make your sound weird—like bass will be out of sync, and it’ll sound hollow instead of full. Let’s break it down: on the speaker wire, one side is usually marked. It might have a stripe, a ridge, text that says “+” or “positive,” or it’s a slightly different color (though most are black/white, so the stripe is easier). On the speaker itself, the connections are usually labeled too—either with a red terminal for positive and black for negative, or a “+” and “-” symbol. Same with your amp/receiver: red is +, black is -. That’s non-negotiable. If you mix them, your left and right speakers won’t line up, and the overall sound quality takes a nosedive. I can’t tell you how many times a customer has come back saying their new speakers sound “off,” and it was just a reversed connection. Don’t be that person.
Now, step 3: connect the wires to the speaker. There are two main types of speaker terminals, right? The binding post (those little posts with a twist cap, common on bookshelf speakers and amps) and the spring clips (small holes you push, common on budget speakers). Let’s cover both, since I get asked about this all the time.
First, binding posts. These are the most common, and they’re actually the easiest once you know how. For the positive terminal (red), you have two options: if you have banana plugs (I sell those too, but you don’t need ‘em), you can just plug ‘em in. But if you’re using bare wire (which is what most people do), here’s how: twist the cap on the terminal counterclockwise to loosen it. Take your twisted copper end, push it into the hole in the middle of the terminal, then twist the cap clockwise tight. Make sure it’s snug—you shouldn’t be able to pull the wire out without a good tug. Do the exact same for the negative terminal (black), using the marked negative wire. Quick note: if you have a lot of extra wire sticking out after you tighten the cap, don’t cut it too short (you’ll need it if you move your speakers later) but also don’t leave it long enough to touch the other terminal. If copper strands touch the positive and negative terminals, that’s a short circuit, which can blow your amp. Yeah, I’ve seen that happen—customer thought he did a good job, left a loose strand, and his amp died. Ouch.
Now, spring clips. These are the tiny, flimsy-looking holes you push. To connect wire here, take a small flathead screwdriver (or even your fingernail, if it’s loose enough) and press down on the little tab next to the hole. That opens the clip. Push your stripped, twisted wire into the hole, then let go of the tab. Test it by pulling the wire gently—if it doesn’t come out, it’s good. Again, positive to red, negative to black, no cross-over. Spring clips can be a little finicky, so make sure the wire is fully inserted and tight. If it feels loose, you might need to twist the wire a little more, or cut a tiny bit off and re-strip, in case the strands are frayed.
Wait, what about if your speaker has speaker wire with a bare end that’s soldered? No, most are bare, but some pre-made wires have spade connectors. Those work too—just slide the spade onto the terminal, then tighten the cap same as you would with bare wire. Same rules apply for phase, of course.
Now, after you connect the speaker wires to the speaker, the next part is connecting the other end to your amp/receiver. This is basically the same process, just on the back of your amp. Same rule: positive to red, negative to black, tighten those terminals. Once both ends are connected, double check everything. Touch each wire gently to make sure none are loose, no strands are crossing between terminals, and you didn’t mix up positive and negative. Then, turn your amp back on (start low, don’t crank it right away!) and test a song you know well—something with good bass, like a hip-hop track or a piano ballad, that you can hear the difference in sound. If it sounds full, balanced, and the bass is coming through clearly, you did it. If it sounds weak or hollow, check the phase—you probably swapped positive and negative on one side. That’s an easy fix, just swap ‘em.
Now, let’s talk about common mistakes I see all the time, since I’m a wire supplier. First, using the wrong gauge wire. Like, using 22-gauge wire (that’s super thin, for headphone aux cords) for outdoor speakers that are 50 feet away from the amp. That’ll cause signal loss, so your sound will be muffled. The general rule: if your run is under 25 feet, use 16-gauge. 25-50 feet, go 14-gauge. Over 50 feet, 12-gauge. I always tell people this—thicker wire = less signal loss, especially over long distances. Don’t skimp on wire gauge, it’s not worth it. Second, not twisting the wire strands. Loose strands = bad connection = bad sound, and sometimes even damage. Third, stripping too much insulation. That’s how you get short circuits—loose copper strands touch each other or the amp’s frame. Fourth, powering the amp on before checking connections. I’ve had customers accidentally short their amp because they skipped that step, and amps are expensive. Save yourself the headache, power off first.
Another thing: backup connections. If you’re worried about loose connections, you can wrap a little electrical tape around the terminal after you tighten it, but don’t wrap it so much that it covers the other terminal. Or, if you’re really paranoid, use wire nuts? No, wait, don’t use wire nuts for speaker connections—those are for household wiring, they’re too big and bulky. Stick to the terminals. Also, if you’re setting up multiple speakers, like a 5.1 home theater, make sure each speaker’s length of wire is roughly the same. If one speaker has a 10-foot wire and another has a 30-foot wire, you’ll get a slight difference in sound, which is annoying. So when you run the wire, measure each side so they’re equal length. That’s a little tip most people don’t know about, but it makes a big difference.
Wait, what if you’re a total beginner, and this all still feels overwhelming? No worries, that’s why I’m here. I’ve helped tons of first-timers walk through this over the phone or email. The best part is, once you do it once, it’s super easy. You’ll get the hang of stripping the wire, twisting the strands, and matching the colors in no time. I also sell pre-stripped speaker wire if you don’t have wire strippers, but honestly, any basic stripper is cheap, and it’s a tool you’ll use for all kinds of audio projects.
Let me wrap this up. The key steps, in case you forgot: 1. Power off your amp, grab your wire and tools. 2. Strip 1/2 inch of insulation, twist the copper strands tight. 3. Match positive/negative (red to red, black to black, stripe to marked). 4. Tighten the terminals on both the speaker and amp, no loose strands. 5. Double check, then test with low volume. If you follow these steps, you won’t have any issues.
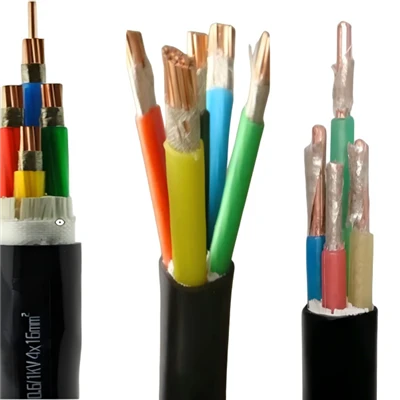
Now, a quick note: if you have any questions about which wire gauge is right for your setup, or if you need help troubleshooting a wonky connection, I’m here to help. Don’t hesitate to reach out to me for more info or to place an order for speaker wire that’s perfect for your needs. Whether you’re setting up a small bedroom system, a backyard BBQ setup, or a full home theater, I’ve got the wire you need to make that solid, long-lasting connection.
VFD Cable References:
- Audioholics. (n.d.). Speaker Wire Gauge Guide & Length Calculator. Retrieved from audioholics.com
- Consumer Electronics Association. (2018). Home Theater Installation Best Practices: Speaker Connections. Retrieved from cea.org
- DIY Audio & Video. (2022). How to Connect Speaker Wire: Step-by-Step Guide for Beginners. Retrieved from diyaudiovideo.com
Anhui Huawang Cable Co., Ltd.
As one of the most professional wire manufacturers and suppliers in China, we also support customized service. If you’re going to buy discount wire, welcome to get pricelist from our factory. Quality products and reasonable price are available.
Address: No. 32, East Street, Batian Street, Datong Town, Tianchang City, Anhui Province
E-mail: Linda@huawangcable.com
WebSite: https://www.huawang-cable.com/
